Search This Blog

November 9, 2014

Some of This and Some of That!

I haven't blogged in about two months and I have to admit, I really do miss it.  I knew once school started, I wouldn't be able to post as much.  Just because I haven't been blogging, doesn't mean I haven't been cooking and trying new recipes.  To make up for lost time, I have decided to post three recipes this week.  One is for breakfast, one is for dinner, and the last recipe is a dessert.  Sorry I have been gone so long.  I will try to post at least once or twice a  month!  

Breakfast Recipe:
Bacon and Cheddar Popovers

Next time I make this recipe, I plan on adding Jimmy Dean sausage and more cheese.  

Ingredients: 
  • 1 2/3 cups of milk (I use whole milk, but you are welcome to use whatever you want)
  • 1 1/2 cup all-purpose flour
  • 3 large eggs
  • 2 tsp salt
  • 2 tsp of season all
  • 1 tsp of black pepper
  • 1/4 tsp cayenne
  • 2 cups shredded Cheddar cheese
  • 1/2 cup finely chopped scallions (about 4 scallions)
  • 10 bacon strips, cooked crisp and coarsely chopped
Directions:
Preheat oven to 450 degrees.  Spray a muffin pan with nonstick spray. Or you can place cupcake liners in the muffin pan.  I prefer not using the liners. 
Combine milk, flour, eggs, salt, season all, black pepper, and cayenne in a bowl.  Mix until mixture is smooth. 


Stir 1 1/2 cup Cheddar, 2/3 of the chopped bacon, and the scallions into batter. Spoon 1/3 cupfuls of batter into prepared muffin pan.  Evenly sprinkle the remaining shredded cheese and bacon over all the muffins.


Bake popovers 15 minutes. Reduce oven to 375 degrees and bake until golden brown, an additional 10 minutes or so. Serve hot.


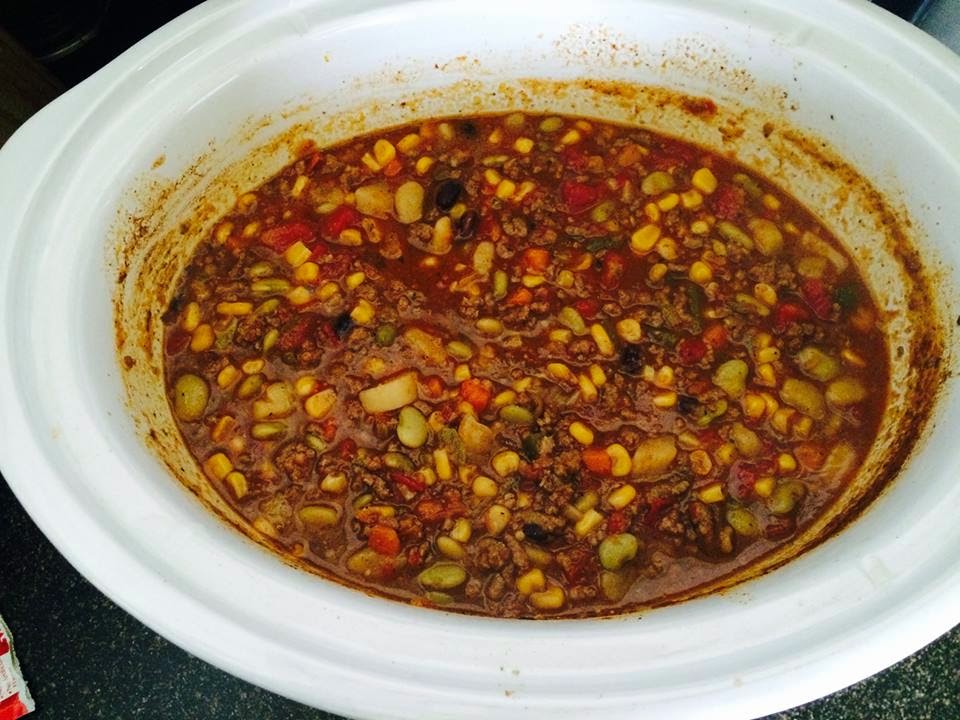
Dinner Recipe: Crockpot Enchilada Soup


Ingredients:
3 tbsp of Canola Oil
1 large onion, diced
1 small green bell pepper, diced 
Black Pepper to taste
1 can (11 ounce) Ro-tel diced tomatoes & green chile's with the juices
1 can of Mexicorn (drained)
1 can of Lima beans (drained)
1 can of diced tomatoes with juice
1 can of seasoned okra, corn, and tomatoes
1 packet of ranch seasoning mix
1/2 packet of McCormick spicy taco seasoning
1 1/2lb of ground beef 
Shredded Cheese
Sour Cream (for topping)
Ritz crackers or tortilla chips

Directions:
1. Place canola oil in a skillet over medium temp
2. Brown ground beef.  Add seasoning to taste (season all, garlic powder, black pepper, crushed red pepper).  Add onions and green pepper to ground beef.
3. Meanwhile, add all canned food items to the slow cooker.  Add about a 1/2 cup of water to the slow cooker. 
4. When ground beef is done cooking, drain oil and then add to slow cooker.  Season pot with season all, black pepper, and garlic.  Add 1/2 packet of the taco seasoning mix (I used the spicy seasoning) and 1/2 packet of the ranch seasoning mix.  Mix well.  
5. Cook on low temp for 6-8 hours.  Stir occasionally and taste test to see what additional seasoning you need.  
6. Serve with sour cream, shredded cheese, and crackers or tortilla chips

Dessert Recipe: Butterfinger Cake
For the past month, I have seen a co-worker with two pans of butterfinger cake.  She makes it for her son's football team.  Every time I see it, I just want to take a huge bite out of it.  I have to thank Kerry for inspiring me to make this dish.  I am not sure if mine is made the way Kerry makes hers, but I thought I would give it a try.  Nick has already sampled it four times and has given me his approval.  

Ingredients:
1 box of yellow cake mix (and ingredients for the cake)
1 can sweetened condensed milk
1 (16oz) jar caramel sauce
1 container of cool whip
3 Butterfinger candy bars, crushed into large crumbs

Directions: 
  1. Bake your cake according to package directions in a rectangular baking pan. 
  2. Let your cake cool for 10 minutes.  Then use a fork to poke holes in the top of the cake.  Make sure to poke holes over entire cake. 
  3. Pour the can of condensed milk over the top of the cake, and spread evenly.
  4. Then, pour the jar of caramel sauce over the top of the cake, and again spread evenly over cake.
  5. Sprinkle some of the crushed butterfinger evenly over the cake. 
  6. Place cake in the refrigerator for 1 hour or until cool.
  7. Once cool, spread the cool whip evenly over the cake.
  8. Sprinkle remaining crushed Butterfinger crumbs on top of the cool whip.  
  9. Return to refrigerator until time to serve, and store covered in refrigerator after serving.
  10. Enjoy!

September 7, 2014

Sausage and Potatoes

This is one of those meals you can make in any season of the year.  It is a comfort meal you and your family is sure to enjoy.  It requires four ingredients, but is packed with so much flavor.  Although my recipe is great, I always request this meal when I visit my parents.  My mom must be keeping an ingredient from me :).  Enjoy!

Recipe: Sausage and Potatoes

Ingredients:
Turkey Sausage or regular pork sausage
1 small onion chopped
1 green bell pepper chopped
Your favorite kind of potatoes sliced (no skin)
Seasonings: Season All, Garlic Powder, Black Pepper, Cayenne Pepper


Directions:
1. Peel your potatoes.  Rinse them off, then slice them like potato chips.  Season the potatoes with the seasonings listed above (or you can just use salt and pepper).  In a large skillet, place some canola cooking oil in the pot (just enough to cover the bottom of the pan).  Cook your potatoes until they are a light brown on both sides (you don't want them to cook like french fries).  I cooked for about 5-10minutes (constantly stirring/tossing).  


2. In a separate skillet, cook your sausage (do not put any oil in the pot, because it will make it's own grease).  After about 5 minutes, add the chopped onion and bell pepper.  (I seasoned my onion and bell pepper with salt, pepper, and garlic before I put it in the pot with the sausage).  Cook until the onions and peppers are tender.  


3. Using a spoon with slotted holes, take the potatoes out of their skillet and add to the skillet with the sausage and onions.  Mix well.  Turn heat down to medium low.  Add a little water (for a gravy) to the pot.  Cover and let it cook for about 5-10 minutes (until potatoes are tender (not falling apart) and there is a little gravy/juice).  Be sure to stir the mixture every couple of minutes (to avoid potatoes sticking to bottom of pot, to determine if you need more water, etc.). 


4. You can serve this meal by itself, with bread, or like my mom with RICE.  I know it's two starches, but it's so good, especially with the gravy.  I also like to serve with some type of bread (Hawaiian rolls, garlic bread, etc.).  This meal is even better the next day!


August 16, 2014

Dinner and Dessert Combo!

I have two recipes for you this week!  A little while back, we went to the local farmers market and they had these vibrant colored bell peppers.  They looked so fresh, so I couldn't pass up the opportunity to purchase some.  That same week, some co-workers and I went out to lunch at Applebee's.  Someone at the table next to us had ordered some type of fajitas.  They smelled AMAZING.  I had taken chicken out earlier in the day, thought about my bell peppers, and I instantly knew what was for dinner!  The first recipe is simple, fast, and should be a hit at the dinner table... Chicken Fajitas.

The second recipe was inspired by my friend Diane.  A few of us went to her house for a dinner and for dessert she had this beautifully displayed dessert.  Mostly everyone who knows me can tell you I am a selective chocolate eater.  Although, I did not have a lot of the dessert because it was chocolate, I can tell you my eyes ate everything in the trifle bowl because of how great it looked.  I called Diane for the recipe when I found out I was in charge of dessert for a dinner party.  Very happy about how few ingredients it required, how quick it was to make, and how amazingly tasty it came out.  I also love how adaptable this recipe is.  

Next week, I will be posting a Southern dish that is really easy and very filling.  Happy cooking and baking everyone!

Recipe: Chicken Fajitas 

Ingredients: 
Chicken Strips
1 Red, Yellow, and Green Bell Pepper Sliced
Fajita Seasoning Mix
Seasonings: Season All, Garlic, black pepper, and paprika
Shredded cheese

Directions: 
1. Preheat oven to 350 degrees.  Thoroughly rinse your chicken strips.  Season with the seasonings listed above to taste.  Place in a baking dish. Set aside. 


2. In a skillet, place a little cooking oil or canola oil.  Add your sliced peppers and cook until somewhat tender.  If you want, you can add a little seasoning to those as well (black pepper, salt, and garlic).  

3. Add the fajita seasoning (look at packet instructions) to the peppers and immediately remove from the stove.  Add the peppers and sauce to the seasoned chicken.  

4. Cover and bake in the oven for about 30 minutes.  I cooked on one side for 15 minutes.  Turned the chicken over and cooked on the other side for 15 minutes.  

5. Uncover.  Get some flour tortillas, make your fajita, and serve.  You have the option of having salsa, sour cream, shredded cheese.  I am sure you will be using your flour tortilla to make sure you get all the excess juice that falls on your plate :). 


Recipe: Oreo Cookie Trifle
 Ingredients:
  • 1 box of milk chocolate brownies (plus the ingredients needed for the brownies)
  • 1 Large container of cool whip
  • 1 Package of Oreo Cookies (you will need to crush/chop)
  • 1 large box of instant chocolate pudding (or two small boxes)
  • Optional: Caramel or chocolate fudge for a topping

Directions: 
1. Preheat oven for brownies.  Make brownies according to package instructions. 
2. Make the instant pudding according to package instructions. 


3. Chop/Crunch your Oreo cookies in a large zip lock bag. 

4. Start layering your trifle:
       a. Layer of brownies (just crumble or scoop and spread around)
       b. Layer of Chocolate Pudding (spread evenly over brownies)
       c. Layer of Cool Whip (spread evenly over pudding)
       d. Layer of Crushed Oreos (spread all around)
       e. Repeat
5. Add some crushed Oreos all over the top.  If you want, you can drizzle some caramel or fudge on top of that!

6. Cover with plastic wrap and place in the refrigerator until you are ready to serve

**Make sure your brownies are cool before you start to assemble your trifle.